Lessons
All ProjectsLesson for Gemma
Kit List
- Gemma
- 2 x Coin Cell batteries
- 1 coin cell battery holder (for 2 coin cells or 2 holder:1 coincell chained together)
- Conductive Thread
- 3 x Neopixels (sewable LEDS)
- Needles
- Scissors
- crocodile clips
- multi metre (optional)
- T-shirt or material to stitch onto
Starter: 10mins
What are mirco controllers? (in general)
Answers that include the follow information are acceptable plus examples: A microcontroller (sometimes abbreviated µC, uC or MCU) is a small ‘computer’ on a single integrated circuit containing a processor core, memory, and programmable input/output peripherals. Microcontrollers are designed for embedded applications, in contrast to the microprocessors used in personal computers or other general purpose applications.
What is Gemma? (specific)

“Get started with Adafruit GEMMA with this lovely starter kit! Included is everything you need to make a basic project. There’s a GEMMA board, four sewable bright RGB pixels, a battery holder and batteries, 2-ply conductive thread, alligator clips to help you test out your circuit, and a USB cable for programming GEMMA.” Adafruit.com
The Gemma does not have a Serial port connection for debugging so the serial port monitor will not be able to send/receive data. Unlike the Flora, the Gemma must be connected to a computer via a USB cable. Once programmed it will run any code uploaded onto it.
Set up IDE or launch application
- Set Up IDE (if not done already) see here for instructions
- Check your kits has everything
- Check that you have spare Coin cell batteries (optional)
Testing your microcontroller. Connect Gemma via the usb to the computer as use Blinky code to test the onboard LED. This activity can be done as a separate activity or part of the circuit testing and then moving on to add more code.
int led = 1;
// blink the built in red LED
// 26 - 03 - 14

void setup() {
 pinMode(led, OUTPUT);
}

//
void loop() {
 digitalWrite(led, HIGH);
 delay(4000);
 digitalWrite(led, LOW);
 delay(8000);
}
GEMMA:
What Can we MAKE?

How many Neopixels can the Gemma Run?
Yes! Gemma was designed to drive short segments of NeoPixels. There is enough RAM on the attiny85 to drive 100 pixels, but depending on program RAM usage you may have to scale back to 60 or 40. Then you have to think about Power.
To use with neopixels:
- Connect the + power line of the strip to Vout on the Gemma, or to a separate 4-7VDC power source such as a 3 or 4 pack of AA batteries.
- Connect the – common ground to the battery pack (if being used) and also to the Gemma GND pin
- Connect the data in line to Gemma #1 – this will let you also see when data is being sent because the #1 red LED will flicker. You can use other pins but start with #1 since its easiest to debug and use
- Install the NeoPixel library as detailed in our Uber Guide, and change the PIN to 1 (its 6 by default)
- Upload and enjoy!
Setting up the IDE (if using for the first time)
MAIN 45mins +++
Task 1 Circuit Design – What are you making?
Draw the Circuit– Individual Task. This is a really good paper based activity. The have to draw the circuit for the project. They should use a colours/labels to highlight the different wires. They will need to think about how much distance to use between each LED/ Neopixel. Compare circuits with a fellow student. Check to see if the circuit would work? Correct any errors.
Test the circuit: Using crocodile clips create a simple 2 neopixel circuit with the Gemma to test the circuit. Don’t forget to remove the battery pack when stitching onto the material.
What Can we MAKE?
-
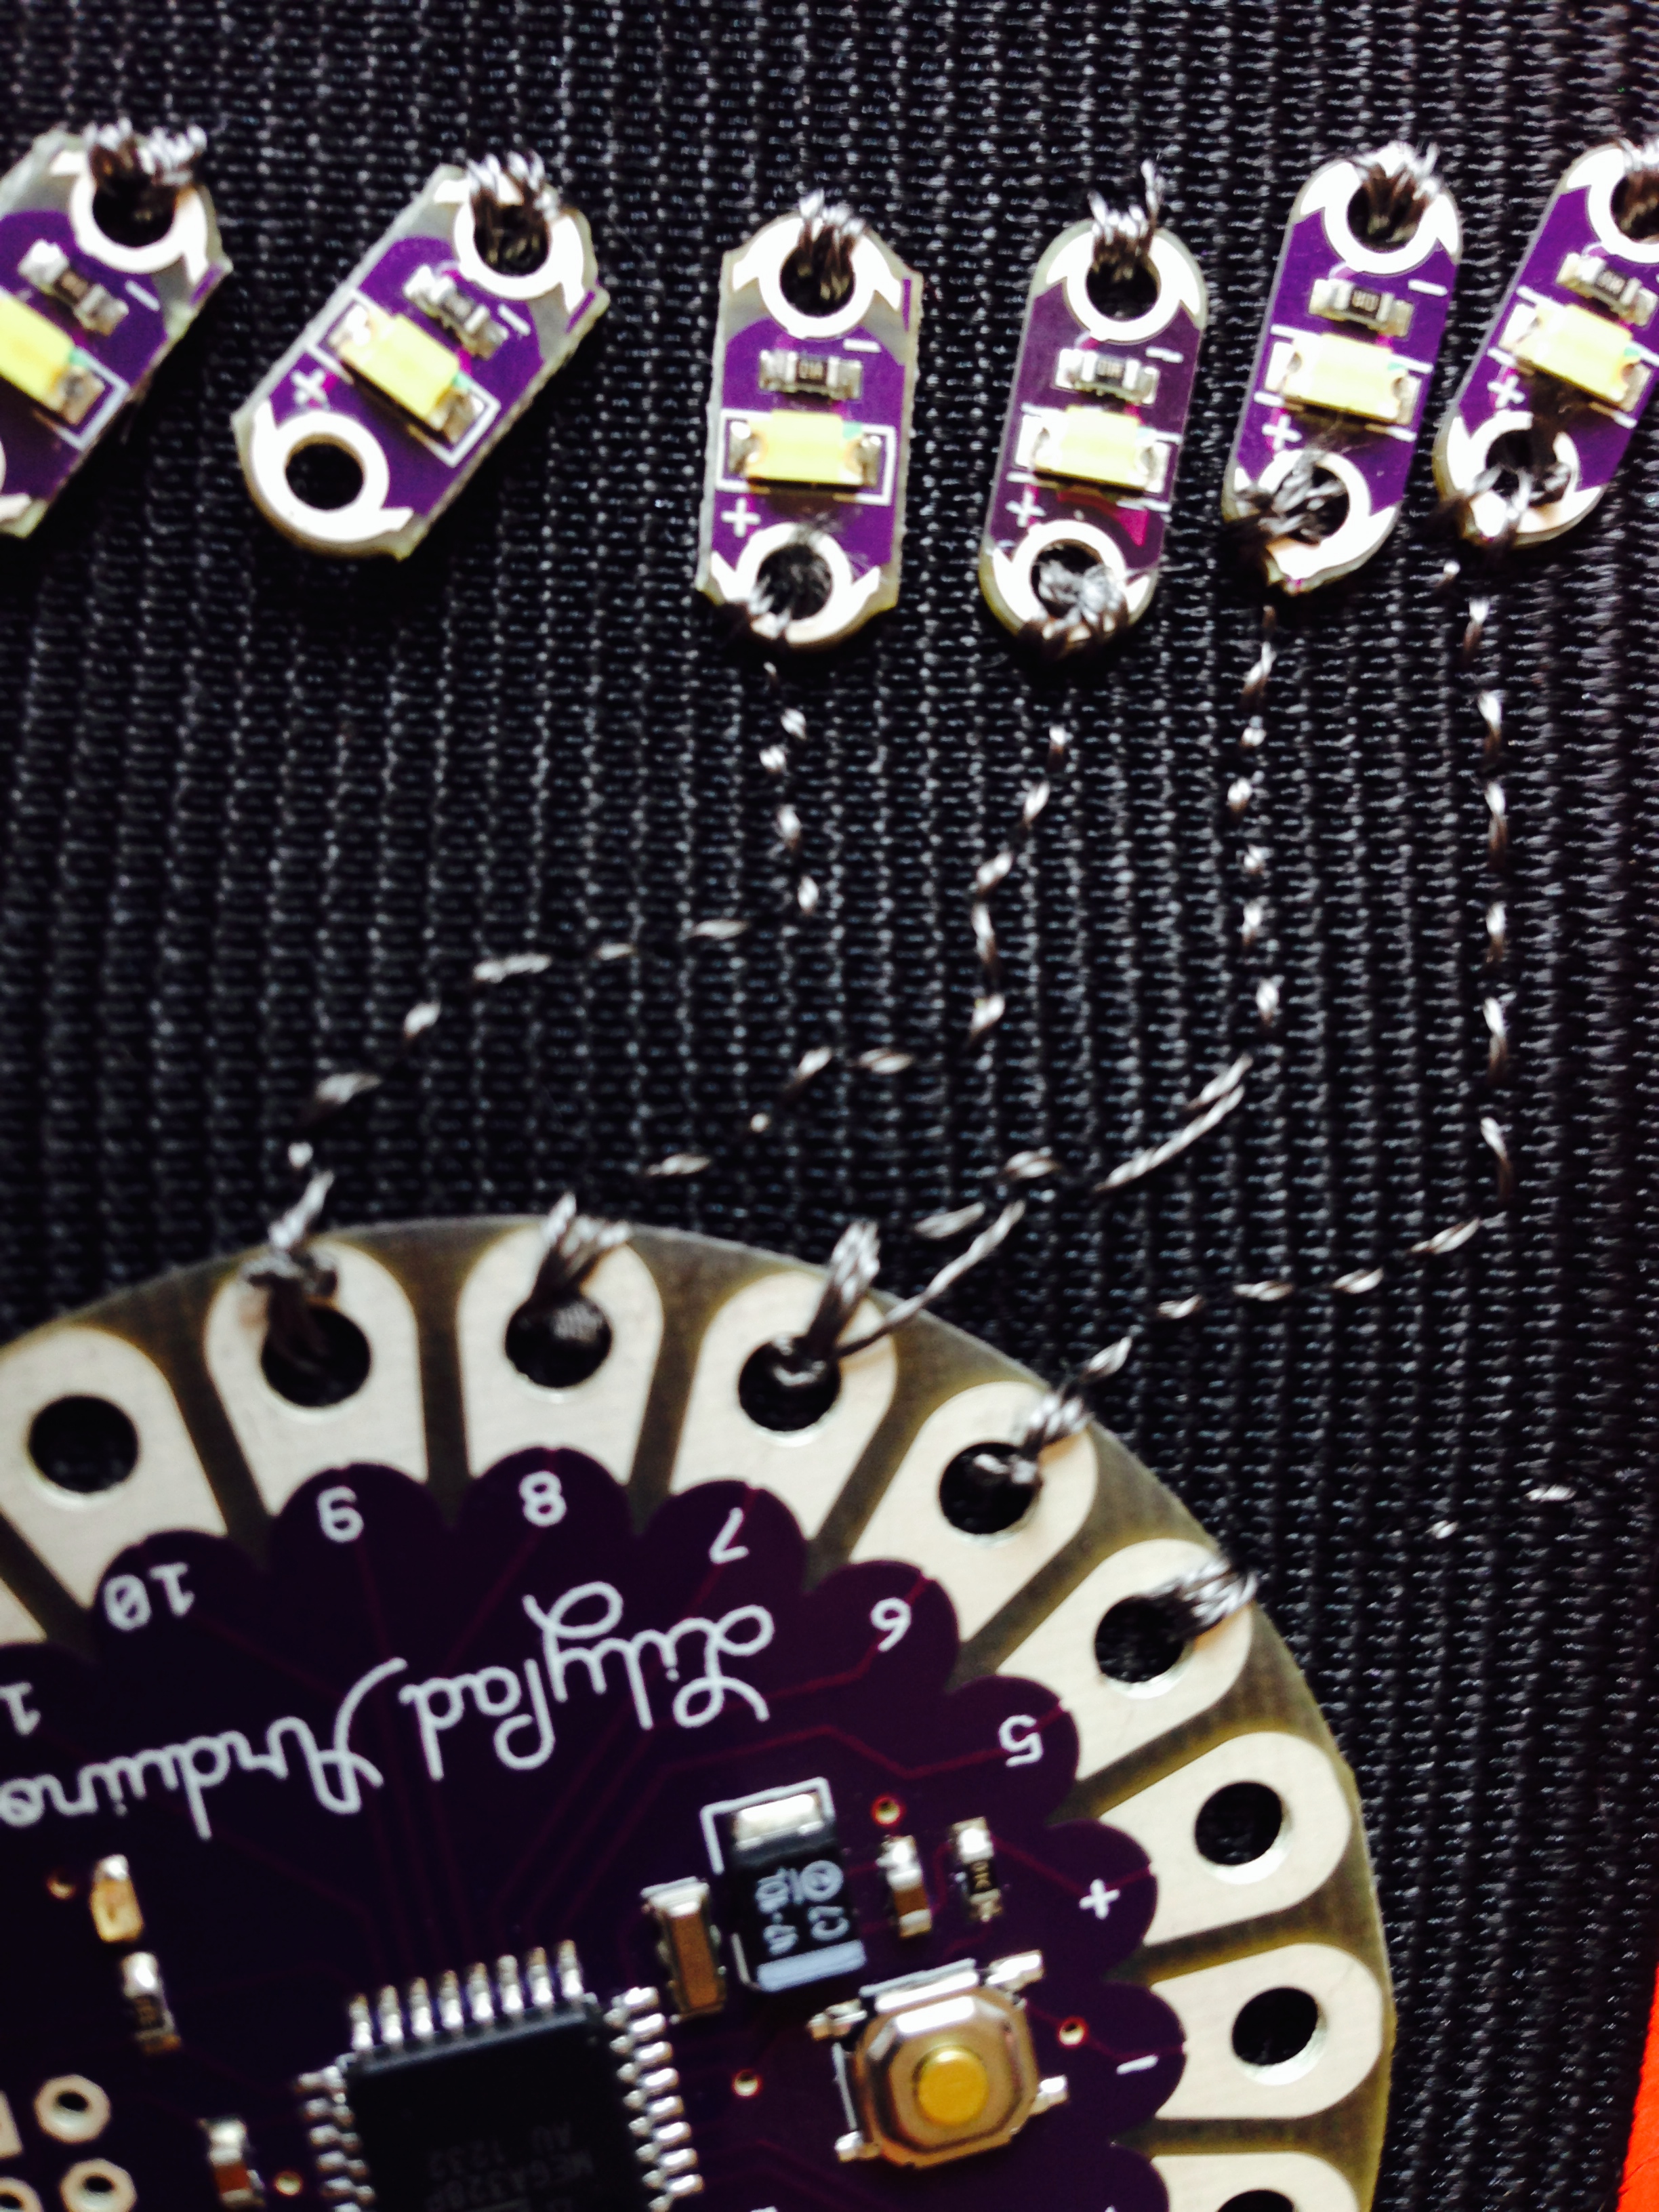
- Lilypad POV stitiching
-
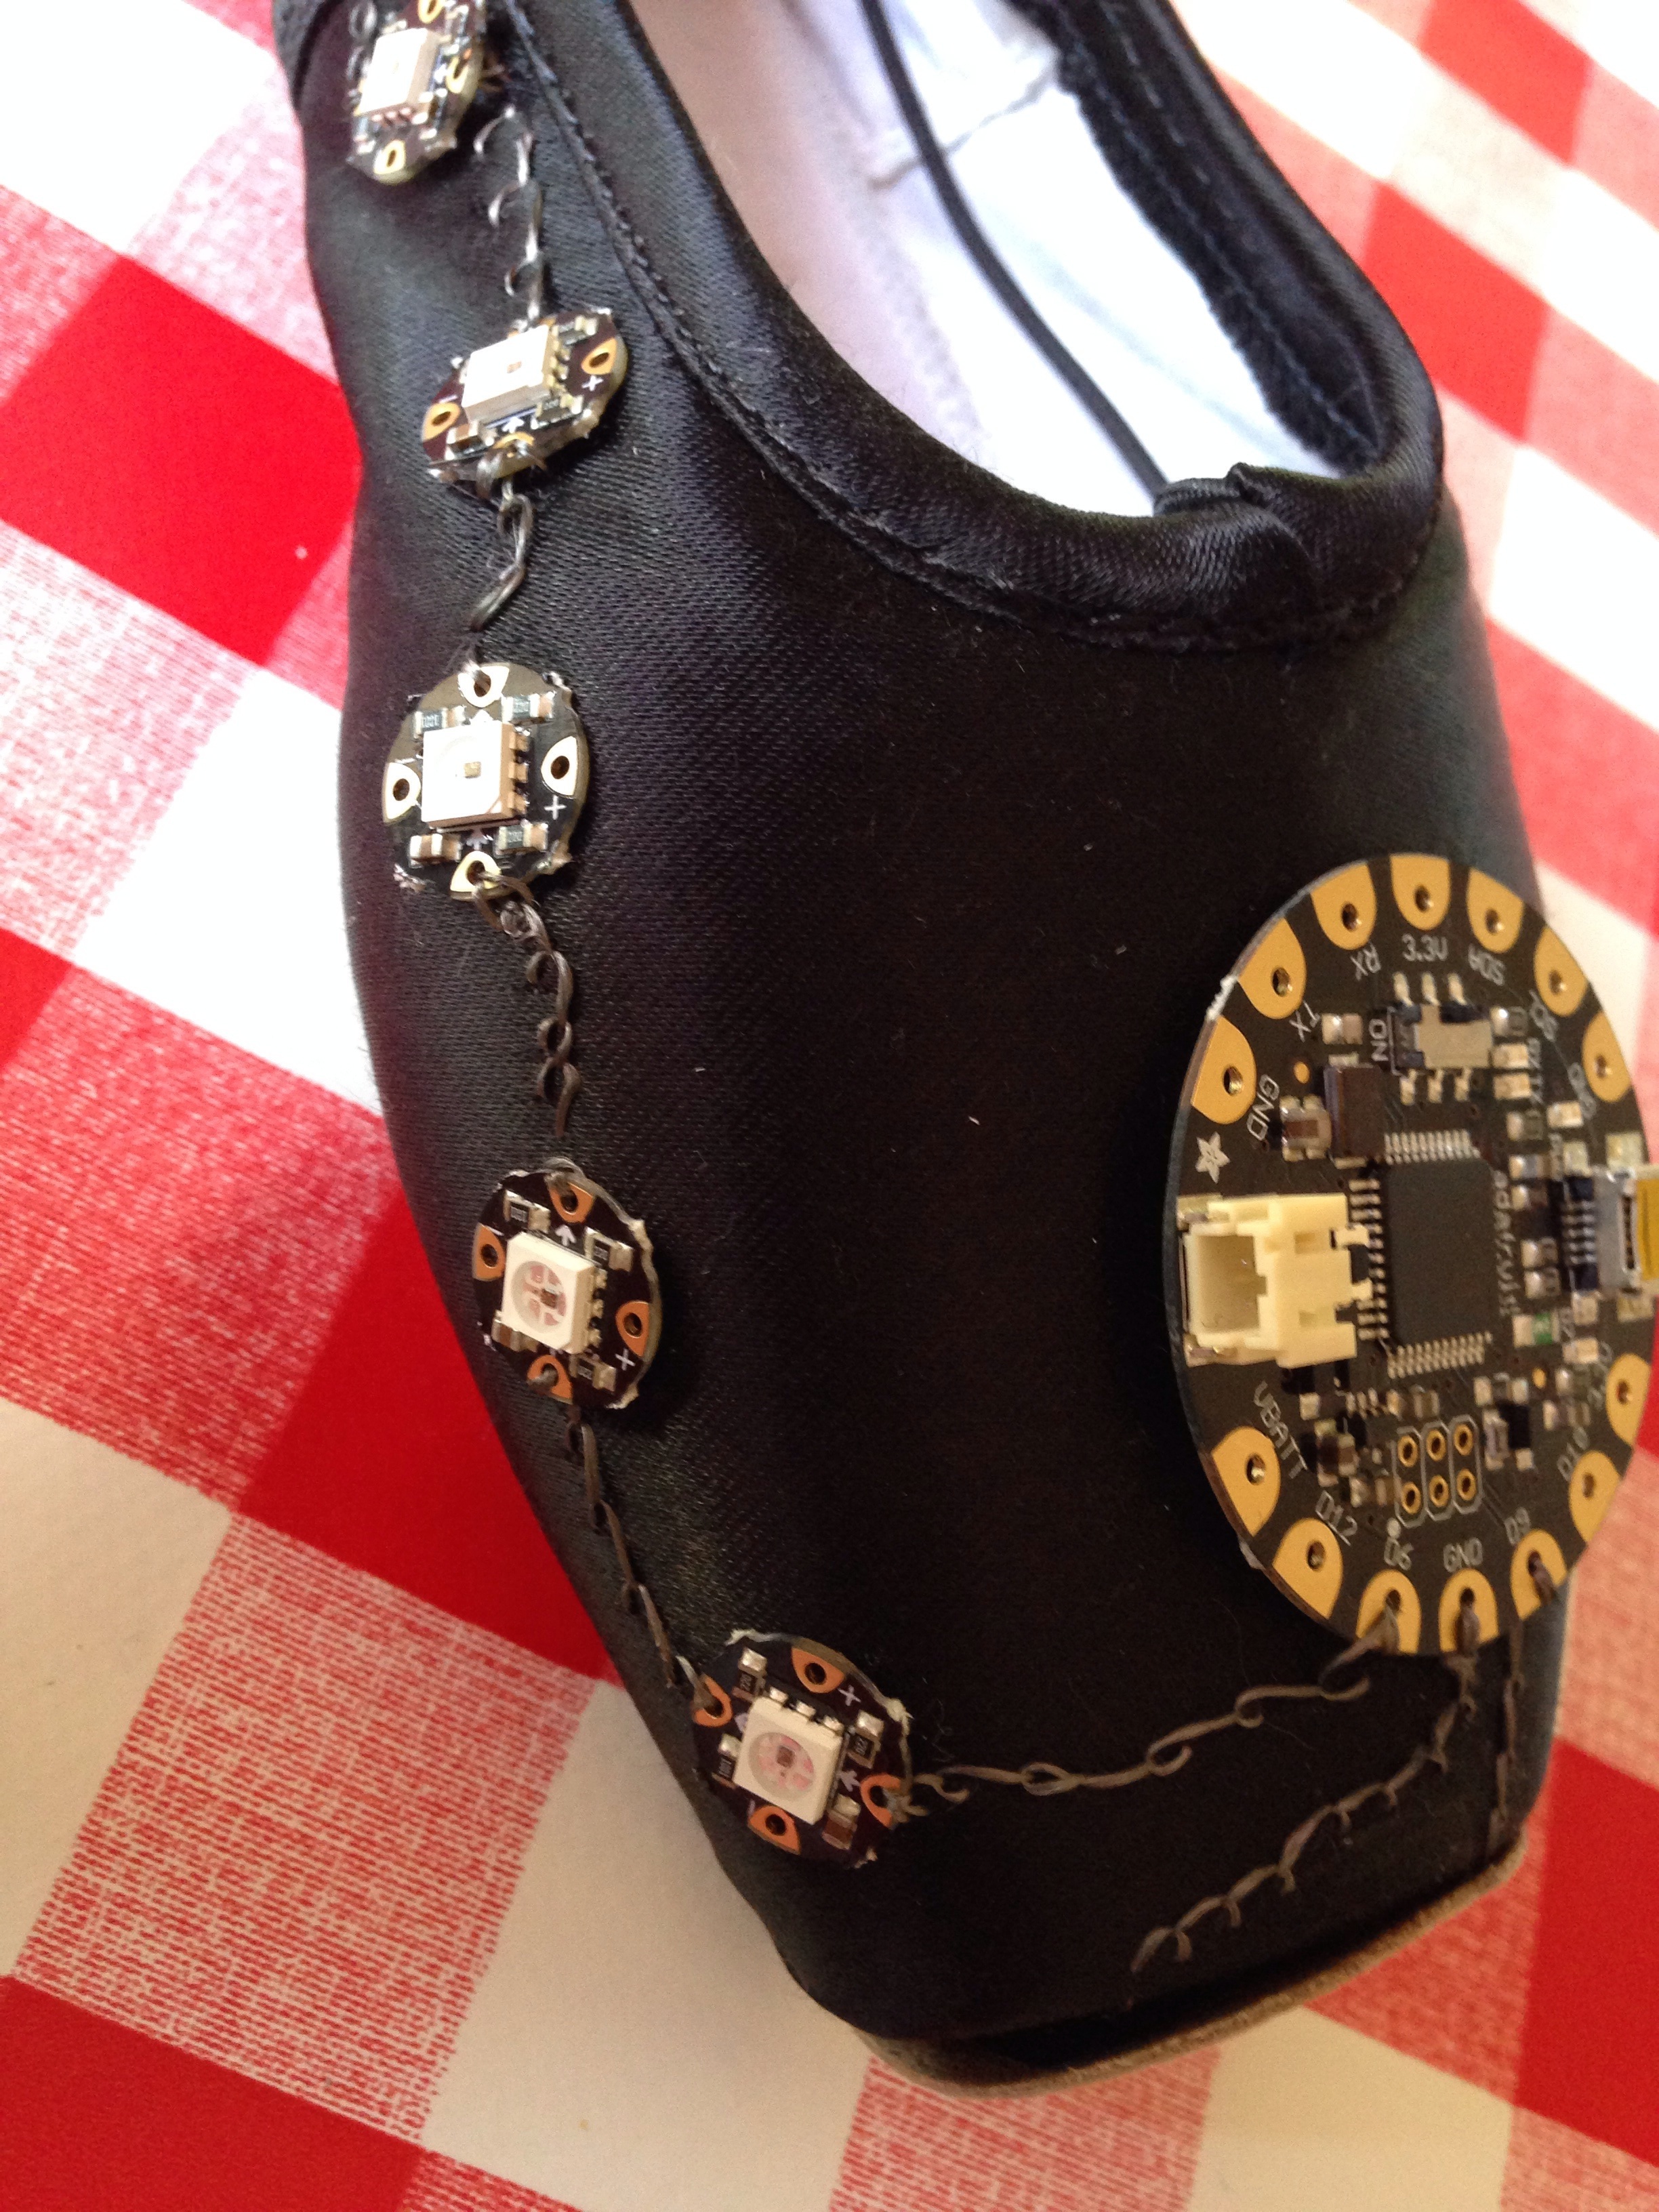
- Wearable Pointshoes
How many Neopixels can the Gemma Run?
Yes! Gemma was designed to drive short segments of NeoPixels. There is enough RAM on the attiny85 to drive 100 pixels, but depending on program RAM usage you may have to scale back to 60 or 40. Then you have to think about Power. The brighter the LEDS the more power.
To use with neopixels:
- Connect the + power line of the strip to Vout on the Gemma, or to a separate 4-7VDC power source such as a 3 or 4 pack of AA batteries.
- Connect the – common ground to the battery pack (if being used) and also to the Gemma GND pin
- Connect the data (drive) in line to Gemma #1 – this will let you also see when data is being sent because the #1 red LED will flicker. You can use other pins but start with #1 since its easiest to debug and use
- Install the NeoPixel library as detailed in our Uber Guide, and change the PIN to 1 (its 6 by default)
- Upload and enjoy!
THINK: What colour or light pattern do I want?
//COLOURWIPE
// Fill the dots one after the other with a color
void colorWipe(uint32_t c, uint8_t wait) {
  for(uint16_t i=0; i<strip.numPixels(); i++) {
      strip.setPixelColor(i, c);
      strip.show();
      delay(wait);
  }


//TWINKLE PATTERN
//Theatre-style crawling lights.
void theaterChase(uint32_t c, uint8_t wait) {
  for (int j=0; j<10; j++) {  //do 10 cycles of chasing
    for (int q=0; q < 3; q++) {
      for (int i=0; i < strip.numPixels(); i=i+3) {
        strip.setPixelColor(i+q, c);    //turn every third pixel on
  }
CODE YOUR PATTERN
Using the sample code modify to produce the pattern and colour you want.
Save your code and name appropriately.
Task 2 Build
Using your chosen piece of clothing or material layout out the components on to the material.
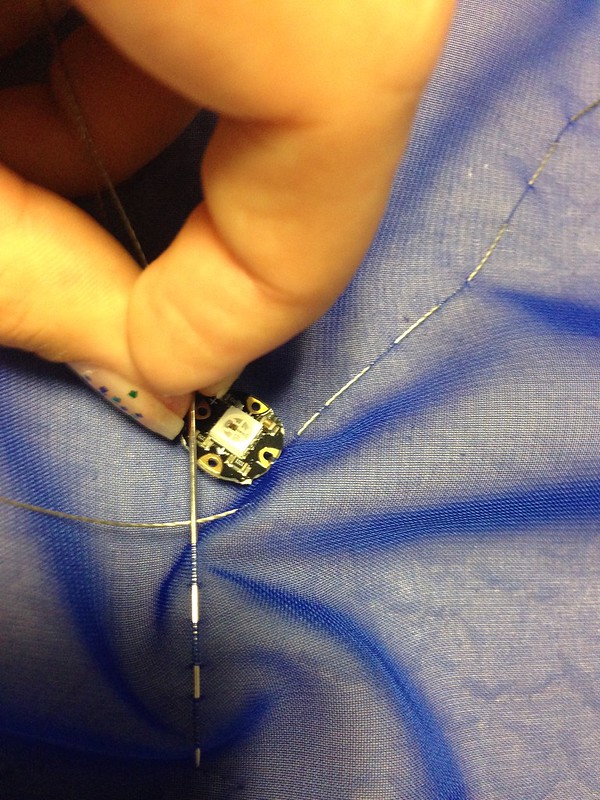
Stitching can take a VERY long time as the thread is harder to work with than normal thread. Allow plenty of time for threading of needles and tying off thread. The image below is a neopixel on chiffon. No recommended for a class project as stitching on chiffon is very difficult and the results are not as reliable as they are with other materials.
- Stitch Drive
- Stitch Ground
- Stitch Power
Stitch the drive thread first. This is good practice. The ground and the power thread can be a single piece of the thread. The ‘Drive’ thread (the one with arrow) has to stop and restart at each Neopixel. Ensure that ALL neopixels are facing in the same direction. The arrow should point away from the Gemma. —–> There should ONLY be thread in between each neopixel

Neopixel stitching
Once you have stitched all the stitching(Drive, Ground and Power) connect the battery pack.
Links to Curriculum:
UK:
- Understand what algorithms are; how they are implemented as programs on digital devices; and that programs execute by following precise and unambiguous instructions
- Create and debug simple programs
- Use sequence, selection, and repetition in programs; work with variables and various forms of input and output
- Use technology safely, respectfully and responsibly; know a range of ways to report concerns and inappropriate behaviour
- Use two or more programming languages, at least one of which is textual, to solve a variety of computational problems; make appropriate use of data structures such as lists, tables or arrays; design and develop modular programs that use procedures or functions
- Understand how instructions are stored and executed within a computer system; understand how data of various types (including text, sounds and pictures) can be represented and manipulated digitally, in the form of binary digits
- Develop their capability, creativity and knowledge in computer science, digital media and information technology
- Develop and apply their analytic, problem-solving, design, and computational thinking skills
USA: Computer Science Mapped Common Core
AUS/ NZ Curriculum
Digital Technologies knowledge and understanding
6.1 Investigate the main components of common digital systems, their basic functions and interactions and how such digital systems may connect together to form networks to transmit data
8.1 Investigate how data are transmitted and secured in wired, wireless and mobile networks, and how the specifications of hardware components impact on network activities
Digital Technologies processes and production skills
6.4 Define problems in terms of data and functional requirements, and identify features similar to previously solved problems
6.9 Manage the creation and communication of ideas and information including online collaborative projects, applying agreed ethical, social and technical protocols
8.10 Create and communicate interactive ideas and information collaboratively (online), taking into account social contexts
8.11 Plan and manage projects, including tasks, time and other resources required, considering safety and sustainability
Design and Technologies knowledge and understanding
6.2 Investigate how forces or electrical energy can control movement, sound or light in a designed product or system
8.3 Analyse how motion, force and energy, are used to manipulate and control electromechanical systems when designing simple, engineered solutions
Design and Technologies processes and production skills
6.8 Apply safe procedures when using a variety of materials, components, tools, equipment and techniques to make designed solutions
8.9 Effectively and safely use a broad range of materials, components, tools, equipment and techniques to make designed solutions
4.9 Plan a sequence of production steps when making designed solutions individually and collaboratively
6.10 Develop project plans that include consideration of resources when making designed solutions individually and collaboratively
8.11 Use project management processes individually and collaboratively to coordinate production of designed solutions